How to Wet Felt a Boho/Pixie Festival Hat
In: Tutorials
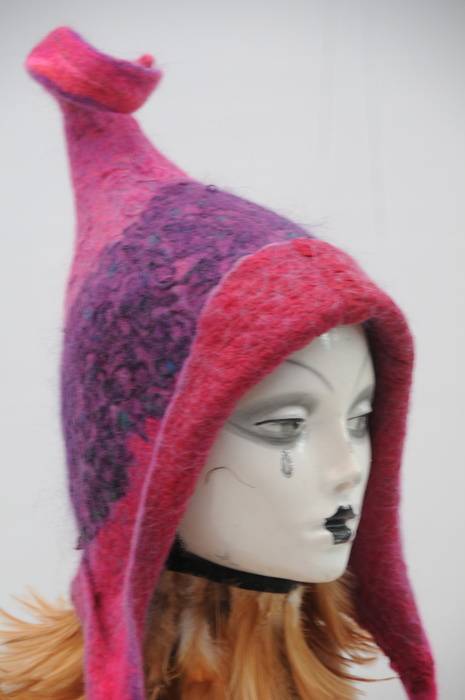
The Wet Felted Boho Festival Pixie Hat

About This Tutorial
Please take time to prepare each element of this Festival Hippy Pixie hat. Put aside a day where you are not likely to have interruptions!
Expect the process to take you some time but keep in mind that there is no need to hurry! This wet-felting tutorial can be broken up into manageable chunks or spread out over a few days if necessary!
If you need to leave the project for any length of time, simply cover it with bubble wrap. This will stop it from drying out. If it does dry out, wet it with warm soapy water and continue from where you left off. Try not to leave it for longer than 3 day or 4 days.
The decorative fold seen on the finished hat is created when you add pure silk fabric to the template before you add any Merino wool(Nuno felting) This is necessary if you want this layer to show on the outside of the fold.
The pure silk fabric can be substituted with Teeswater curls or any other decorative curls or fibers of your choice.
I suggest that you use cool or lukewarm soapy water for this project, especially if silk fabric is used. Very hot water is likely to shrink the fibers before they can migrate into the silk(Nuno Felting).
Template, Wool Roving, and a Silk Fabric
What You'll Need
Printable PDF Pixie Hat Template
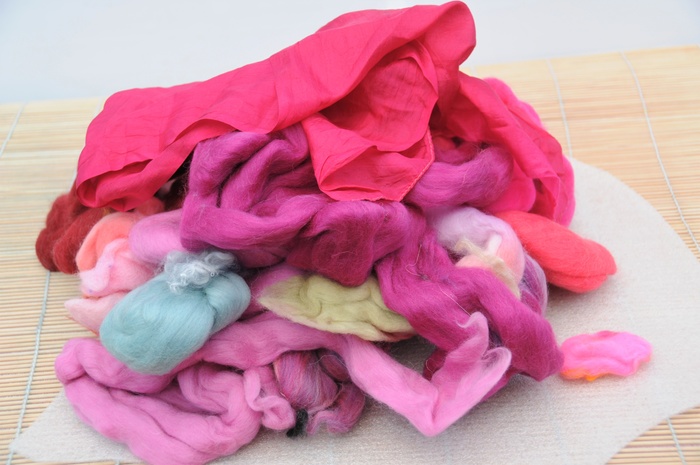
250 grams Merino wool roving In your own choice of colors
Pure Silk Re-cycled Scarves[/b} will add texture to the folds on the hat
Mohair Wool (Knitting Wool) for the surface decoration.
A Heavy-duty Bamboo Blind
Warm Soapy Water
Bubble Wrap
Floor Underlayment Foam from which the template will be cut. Underfloor foam is the perfect choice for this template because it can be re-used many times over.
Scissors Make sure you have a sharp pair!
Felt-tip Pen This is for drawing around the pattern. Once the template has been cut out you should use a damp cloth to remove any traces of ink which might have been left behind so that they do not bleed into the wool.
HOW TO MAKE THE PIXIE HAT
1. Download the Pattern
Print the pattern (borderless printing)actual size (100%) so that the template prints out at the correct size.
A 1-inch square is marked on each pattern piece for reference. Perfect results cannot be guaranteed if the pattern is not printed to scale.
Cut out the 7 pattern pieces
Assemble each piece in the correct order and sellotape them together.
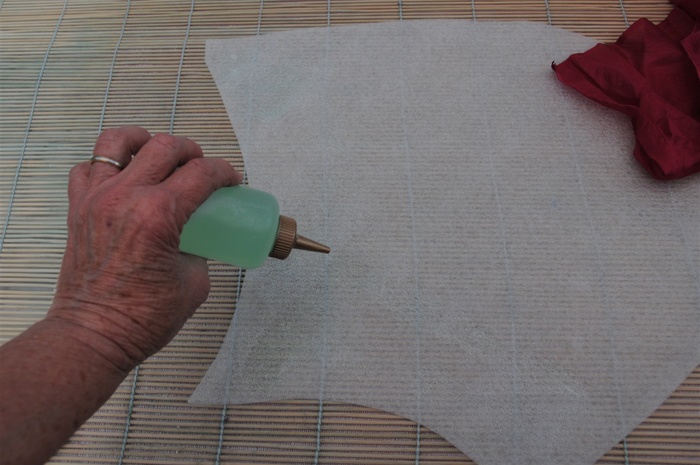
Place the paper template onto underfloor foam and draw around the outer edges using the felt tip pen.
Carefully cut out the template using a sharp pair of scissors.
Use a damp cloth to remove any traces of felt tip pen markings to avoid having them bleed into the wool.
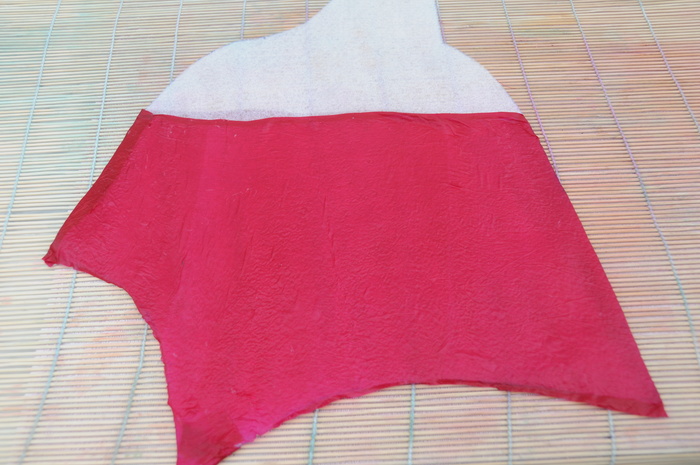
Underfloor Foam Template With Silk Fabric

2. Wet the template with warm soapy water
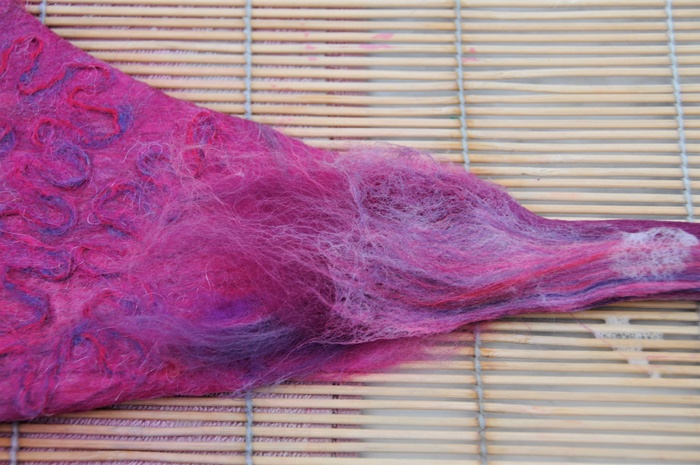
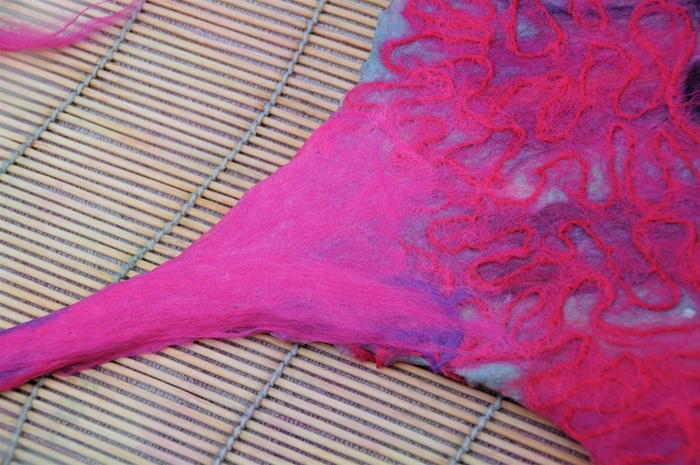
3. Lay the silk fabric across the template as shown below and trim leaving sufficient fabric to fold neatly over the edges
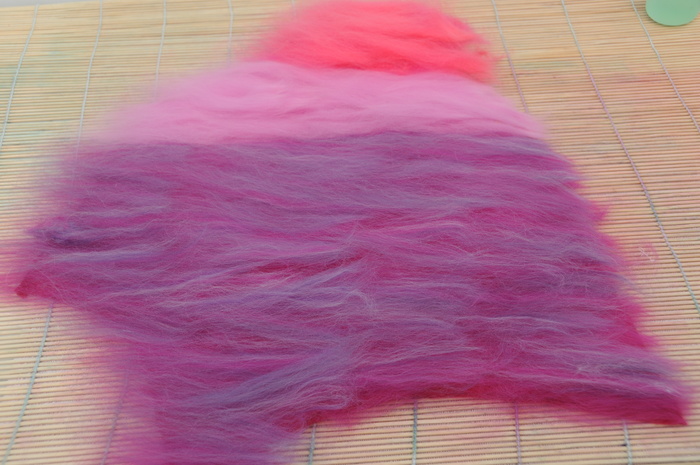
4. Cover the template and the fabric using Merino wool roving as shown
5. Wet the fibers using warm soapy water
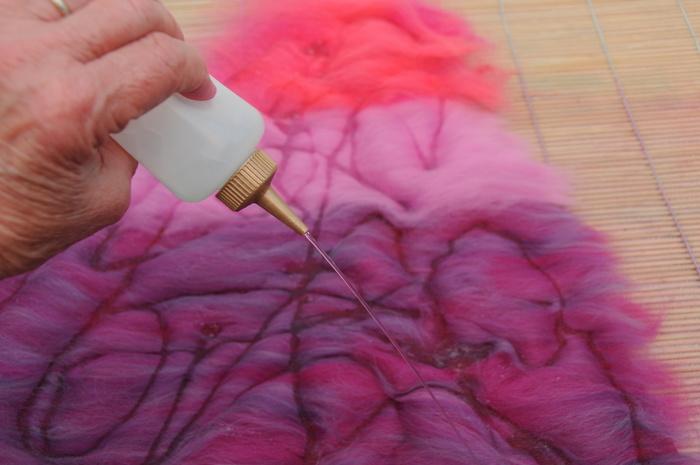
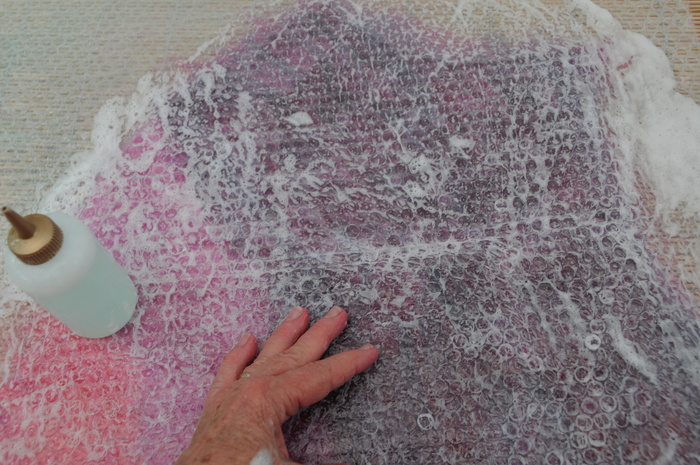
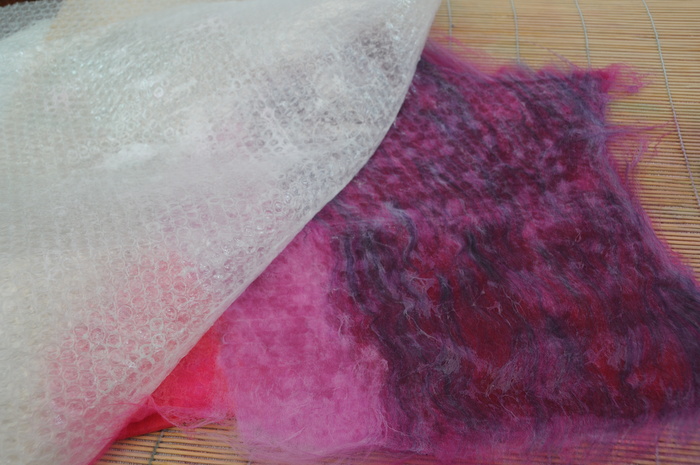
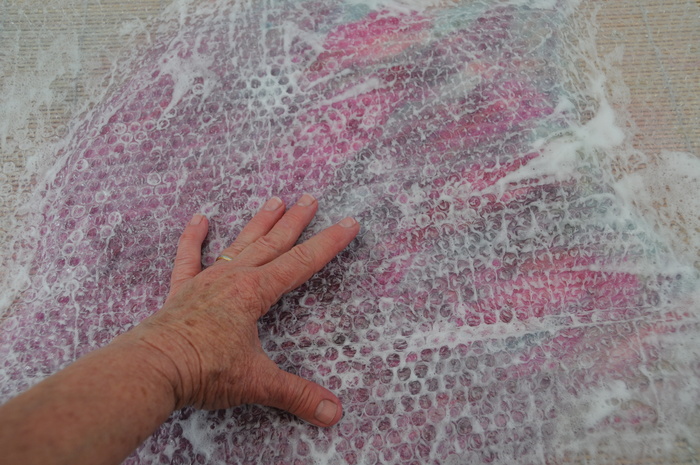
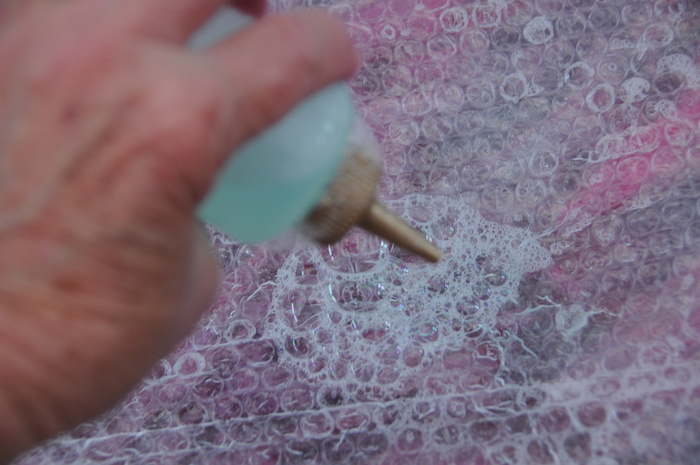
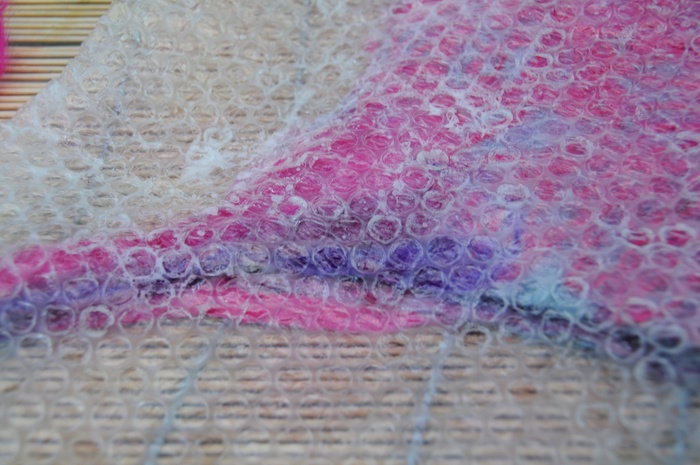
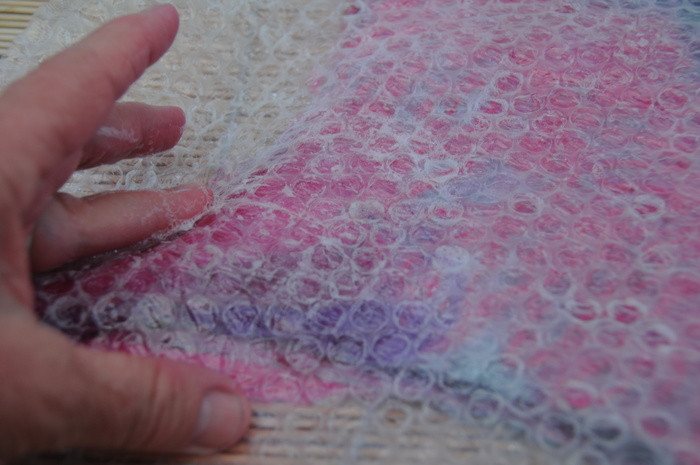
6. Cover with bubble wrap and wet the surface. This will facilitate easy rubbing on the surface
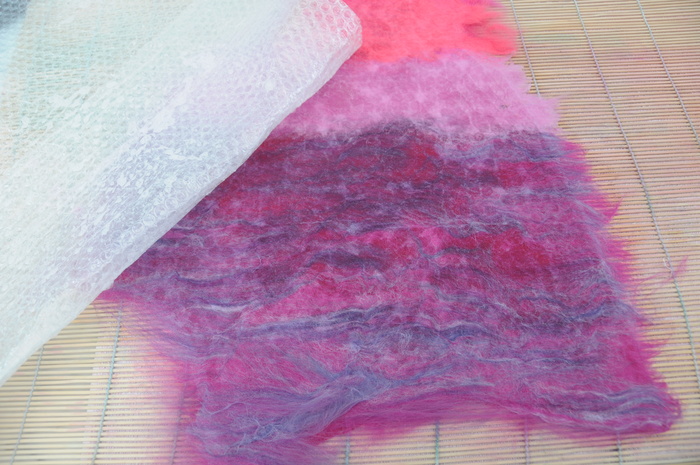
7. Gently remove the bubblewrap
8. Neaten the edges using a little warm soapy water and use your fingers to create a neat edge
9. Add a layer of silk fabric and Merino fibers to match the previous layer
10. Wet the fibers with warm soapy water
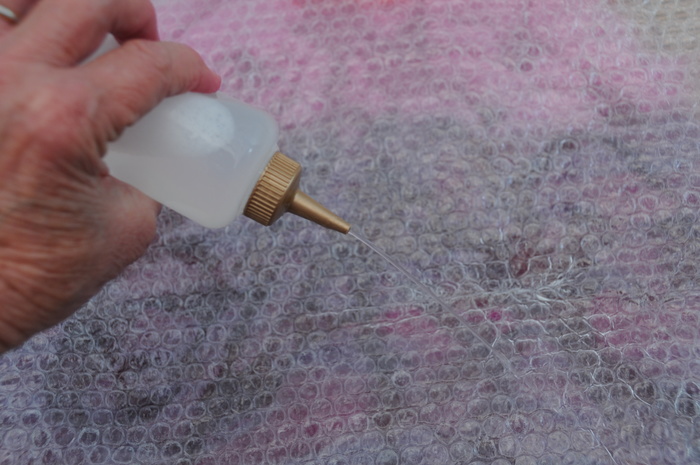
11. Cover with bubble wrap and wet the surface, rubbing well
12. Gently remove the bubble wrap
13. Flip the project Over
14. Neaten the edges using warm soapy waters and your fingers.
15. Cover the 1st layer with a second layer of Merino wool fibers
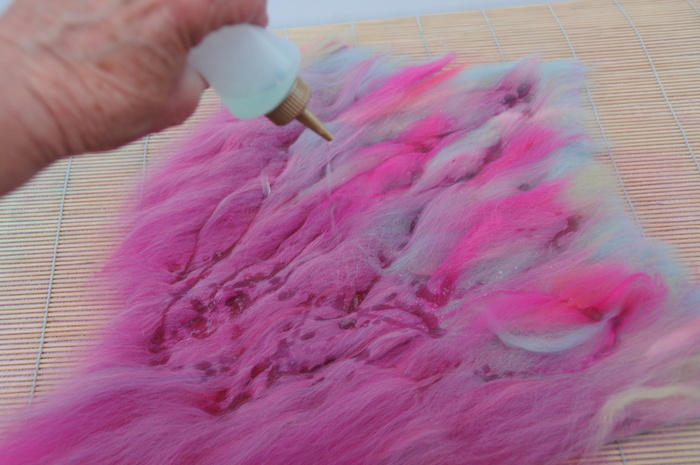
16. Wet with warm soapy water
17. Cover with bubble-wrap, rub and gently remove when the fibers have flattened
18. Neaten the edges
19. Add a second layer of Merino fibers
20. Wet the fibers
21. Cover with bubble wrap, wet and rub well
22. Gently remove the bubble wrap
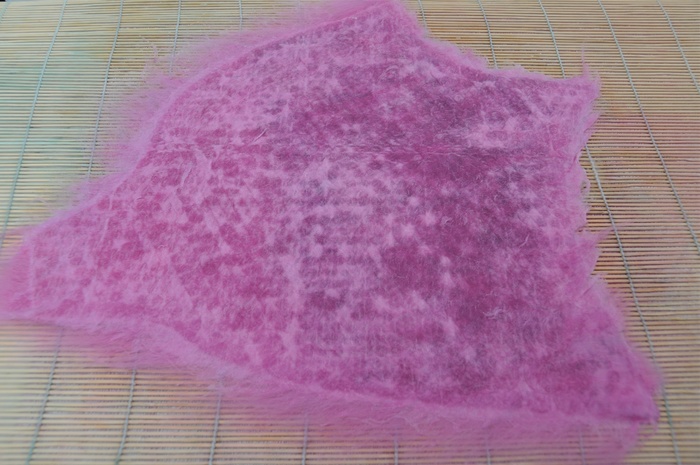
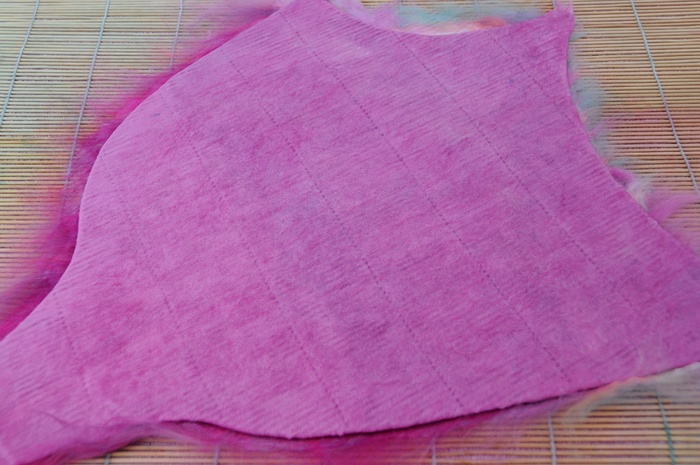
23. The project with the bubble-wrap removed
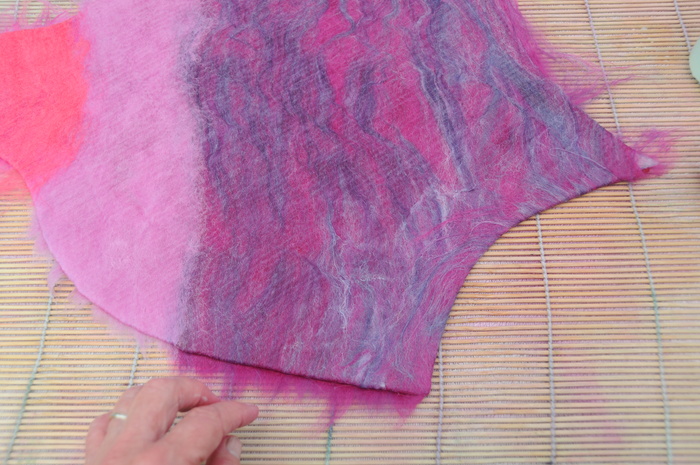
24. Fip the project over and neaten the edges

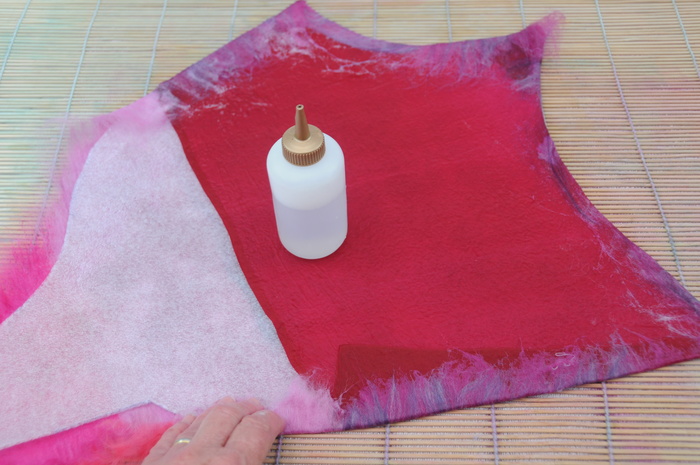
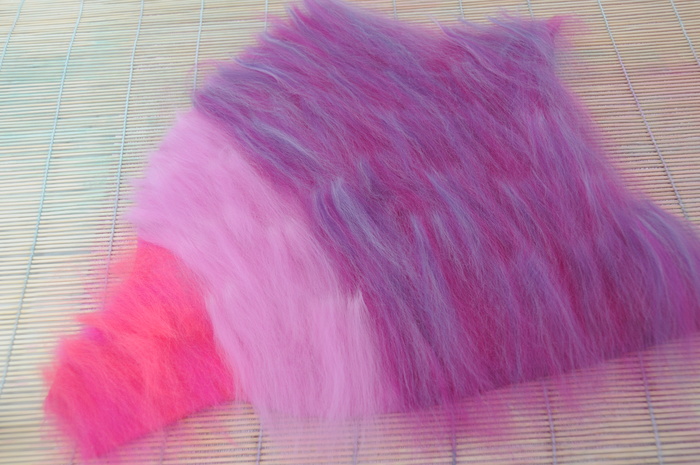
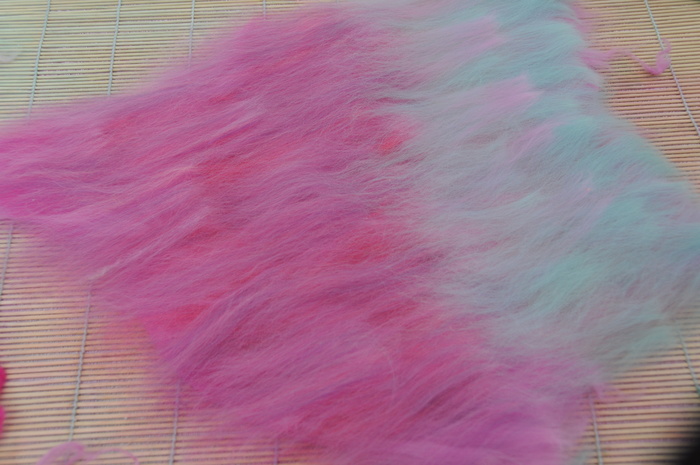
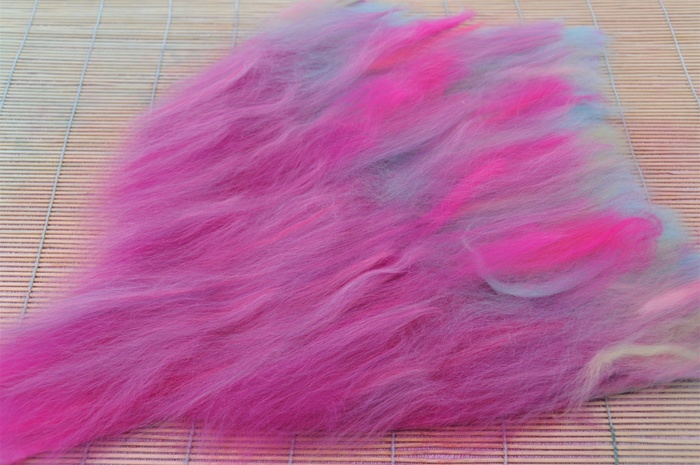
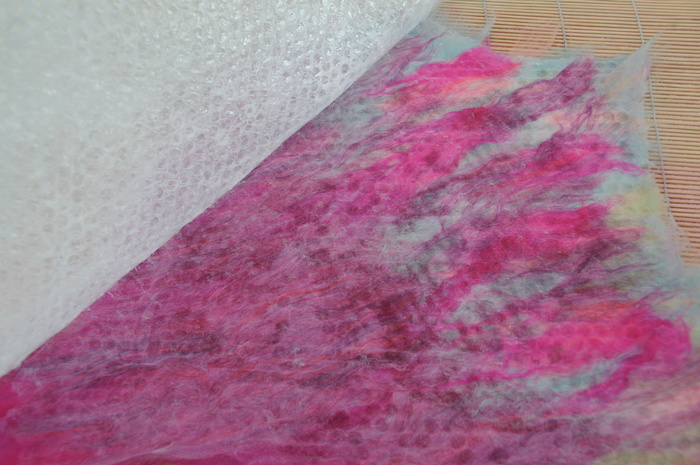
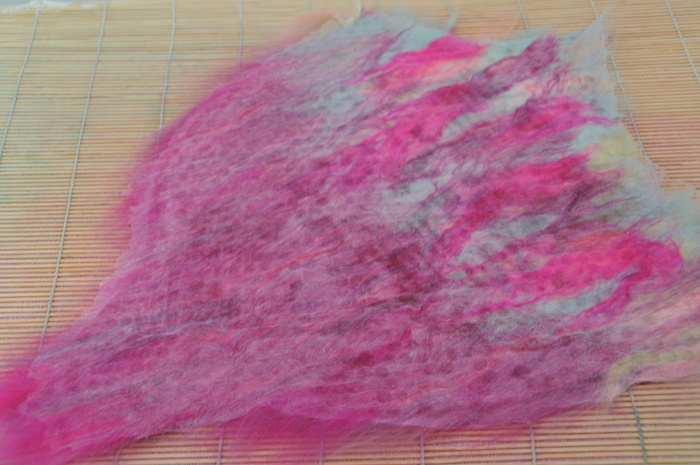
25. Add a 3rd Layer of Merino wool fibers.
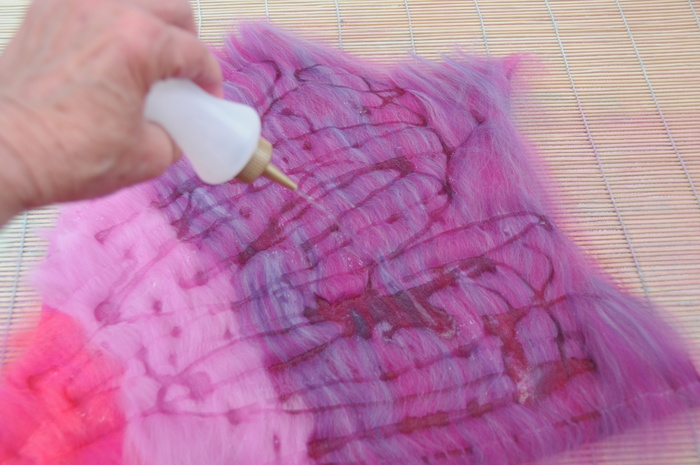
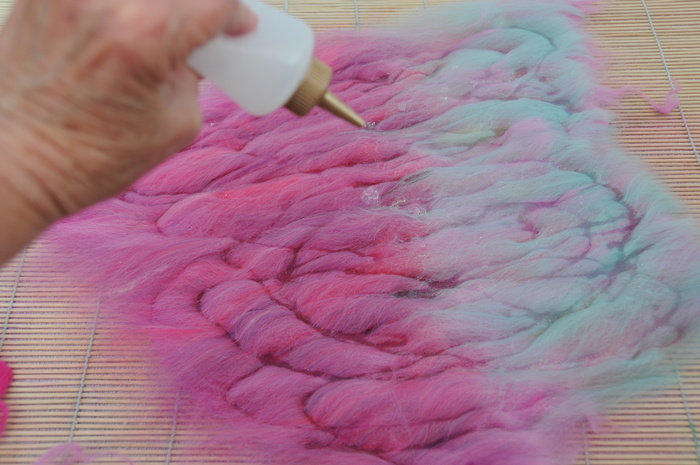
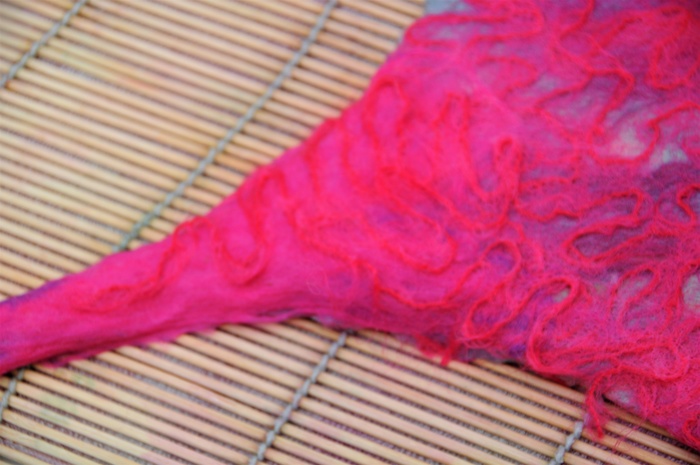
26. Decorate the final layer using the mohair wool or use decorative fibers of your own choice.
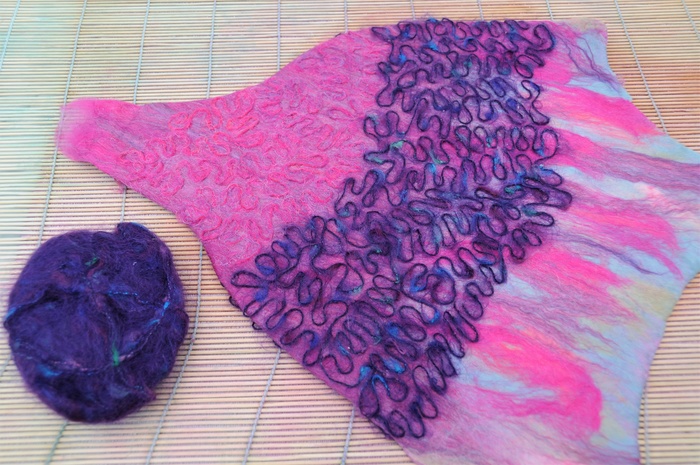
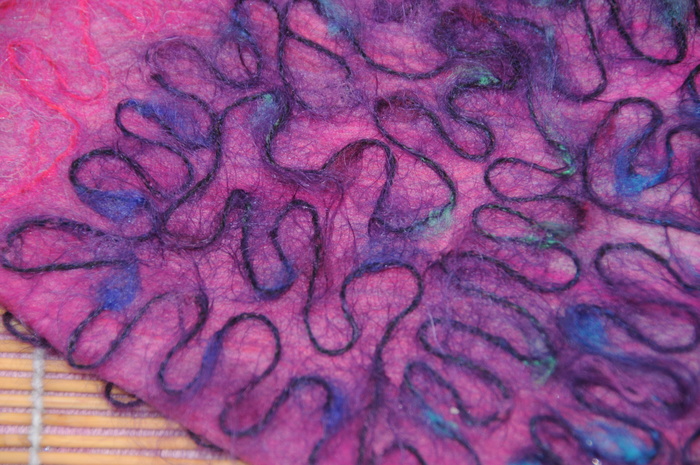
27. Close-up of the Mohair knitting wool detail
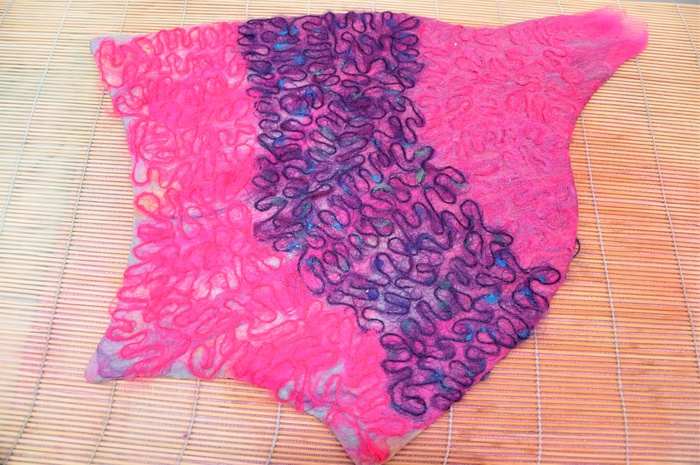
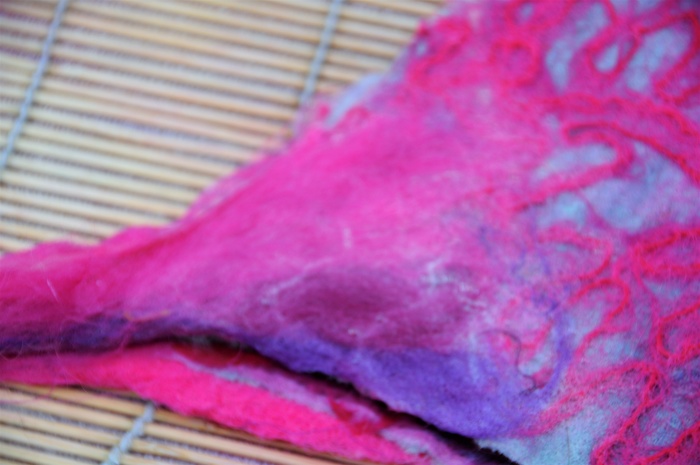
28. Side 1 and Side 2 of the Decorative Layer
THE DECORATIVE LAYER
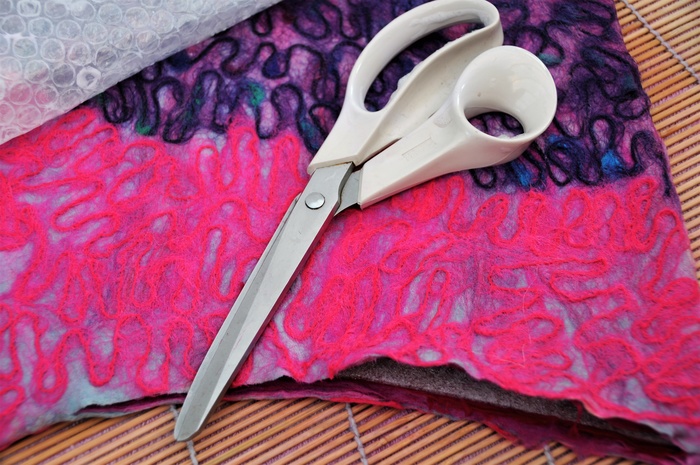
29. Use a sharp pair of scissors to cut the lower edge of the hat open.
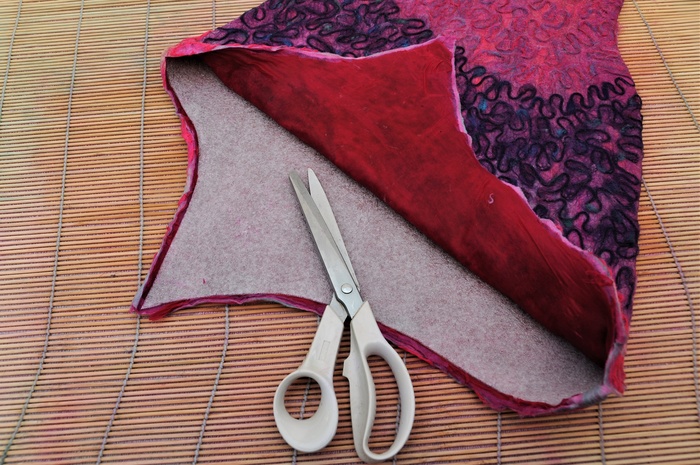
30. Cut the opening but do not remove the template at this stage. It is there to keep the layers separate and should stay there until the hat is completely felted.
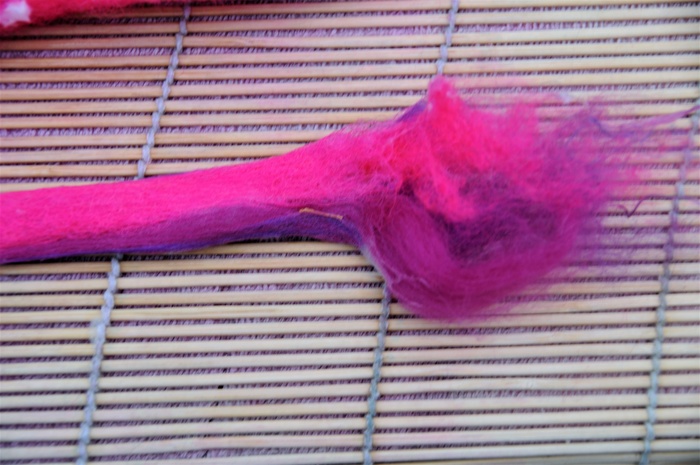
31. Prepare wool roving ties for the hat and the tail. Wet them with warm soapy water. Rub them between your fingers and on the bamboo mat until the fibers no longer move. Keep the fibers on one end dry as shown.
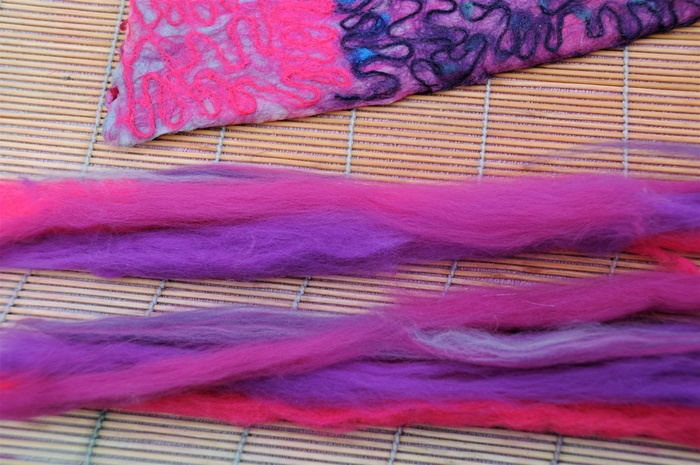
34. The rolled hat tie with one dry end
35. Attaching the tie using warm soapy water
36. One Tie has attached to the hat but still to be neatened on the inside
37. The decoration on the join being 'repaired' to enhance the design
38. Repeat with the 2nd tie
39. Separate the 2 ties using bubble wrap. Cover with bubble wrap and rub both sides of the join to complete it.
40. Rubbing the bubble wrap on all sides to ensure a neat tidy join
41. The join further enhanced by adding merino wool to the join

42. Add the tail in the same manner. More info on attaching the tail can be found here.
About This Tutorial
Please take time to prepare each element of this Festival Hippy Pixie hat. Put aside a day where you are not likely to have interruptions!
Expect the process to take you some time but keep in mind that there is no need to hurry! This wet-felting tutorial can be broken up into manageable chunks or spread out over a few days if necessary!
If you need to leave the project for any length of time, simply cover it with bubble wrap. This will stop it from drying out. If it does dry out, wet it with warm soapy water and continue from where you left off. Try not to leave it for longer than 3 day or 4 days.
The decorative fold seen on the finished hat is created when you add pure silk fabric to the template before you add any Merino wool(Nuno felting) This is necessary if you want this layer to show on the outside of the fold.
The pure silk fabric can be substituted with Teeswater curls or any other decorative curls or fibers of your choice.
I suggest that you use cool or lukewarm soapy water for this project, especially if silk fabric is used. Very hot water is likely to shrink the fibers before they can migrate into the silk(Nuno Felting).
Template, Wool Roving, and a Silk Fabric
What You'll Need
Printable PDF Pixie Hat Template
250 grams Merino wool roving In your own choice of colors
Pure Silk Re-cycled Scarves[/b} will add texture to the folds on the hat
Mohair Wool (Knitting Wool) for the surface decoration.
A Heavy-duty Bamboo Blind
Warm Soapy Water
Bubble Wrap
Floor Underlayment Foam from which the template will be cut. Underfloor foam is the perfect choice for this template because it can be re-used many times over.
Scissors Make sure you have a sharp pair!
Felt-tip Pen This is for drawing around the pattern. Once the template has been cut out you should use a damp cloth to remove any traces of ink which might have been left behind so that they do not bleed into the wool.
HOW TO MAKE THE PIXIE HAT
1. Download the Pattern
Print the pattern (borderless printing)actual size (100%) so that the template prints out at the correct size.
A 1-inch square is marked on each pattern piece for reference. Perfect results cannot be guaranteed if the pattern is not printed to scale.
Cut out the 7 pattern pieces
Assemble each piece in the correct order and sellotape them together.
Place the paper template onto underfloor foam and draw around the outer edges using the felt tip pen.
Carefully cut out the template using a sharp pair of scissors.
Use a damp cloth to remove any traces of felt tip pen markings to avoid having them bleed into the wool.
Underfloor Foam Template With Silk Fabric
2. Wet the template with warm soapy water
3. Lay the silk fabric across the template as shown below and trim leaving sufficient fabric to fold neatly over the edges
4. Cover the template and the fabric using Merino wool roving as shown
5. Wet the fibers using warm soapy water
6. Cover with bubble wrap and wet the surface. This will facilitate easy rubbing on the surface
7. Gently remove the bubblewrap
8. Neaten the edges using a little warm soapy water and use your fingers to create a neat edge
9. Add a layer of silk fabric and Merino fibers to match the previous layer
10. Wet the fibers with warm soapy water
11. Cover with bubble wrap and wet the surface, rubbing well
12. Gently remove the bubble wrap
13. Flip the project Over
14. Neaten the edges using warm soapy waters and your fingers.
15. Cover the 1st layer with a second layer of Merino wool fibers
16. Wet with warm soapy water
17. Cover with bubble-wrap, rub and gently remove when the fibers have flattened
18. Neaten the edges
19. Add a second layer of Merino fibers
20. Wet the fibers
21. Cover with bubble wrap, wet and rub well
22. Gently remove the bubble wrap
23. The project with the bubble-wrap removed
24. Fip the project over and neaten the edges
25. Add a 3rd Layer of Merino wool fibers.
26. Decorate the final layer using the mohair wool or use decorative fibers of your own choice.
27. Close-up of the Mohair knitting wool detail
28. Side 1 and Side 2 of the Decorative Layer
Complete 1 side of the decorative layer as shown
Cover with bubble wrap.
Wet the bubble wrap and rub.
Turn the project over and neaten the edges.
Repeat the design on the 2nd side.
Cover, wet and rub well
Roll inside a heavy-duty bamboo blind until the fibers no longer move
THE DECORATIVE LAYER
29. Use a sharp pair of scissors to cut the lower edge of the hat open.
30. Cut the opening but do not remove the template at this stage. It is there to keep the layers separate and should stay there until the hat is completely felted.
31. Prepare wool roving ties for the hat and the tail. Wet them with warm soapy water. Rub them between your fingers and on the bamboo mat until the fibers no longer move. Keep the fibers on one end dry as shown.
34. The rolled hat tie with one dry end
35. Attaching the tie using warm soapy water
36. One Tie has attached to the hat but still to be neatened on the inside
37. The decoration on the join being 'repaired' to enhance the design
38. Repeat with the 2nd tie
39. Separate the 2 ties using bubble wrap. Cover with bubble wrap and rub both sides of the join to complete it.
40. Rubbing the bubble wrap on all sides to ensure a neat tidy join
41. The join further enhanced by adding merino wool to the join
42. Add the tail in the same manner. More info on attaching the tail can be found here.

Comments
 By Kate Dooley: Thank you so much for your generosity in sharing this lovely design. By Sally Gulbrandsen: You are welcome Kate, I appreciate the feedback, thank you. By Sunshine MacIntyre: Thank you so much for sharing this freely. I can't wait to make one! By Susan Gertz: Wow! Looks amazing! I hope to try this! By Susan Gertz: Wow! Looks amazing! I hope to try this! By Susan Gertz: Wow! Looks amazing! I hope to try this! By Susan Gertz: Wow! Looks amazing! I hope to try this! By Susan Gertz: Wow! Looks amazing! I hope to try this! By Susan Gertz: Wow! Looks amazing! I hope to try this! By Susan Gertz: Wow! Looks amazing! I hope to try this!